Aadhaar Update: This guide shows you how to update Aadhaar details effectively. Find out how to correct information online or at a center, with advice on required documents and troubleshooting.
The government advises individuals with Aadhaar numbers to update their Aadhaar documents at least once every 10 years.
Understanding Aadhaar Updates
It is a wise move to keep your Aadhaar card updated. This article will discuss some of the reasons you might need to update it and why accuracy is so crucial.
Why Update Aadhaar?
People need to update their Aadhaar cards for a few different reasons. Here are some examples:
- You moved to a new house. If you’ve moved, you should update your address on your Aadhaar card. That way, when people need to contact you, they send things to the right place.
- Your name has changed: There are numerous reasons why this could occur. For instance, it is possible that your parents officially changed your name or that you adopted a new last name when they got married. To ensure that everyone knows who you are, it is crucial to update this information on your Aadhar card.
- Your phone number has changed: Sometimes people get new phone numbers. If your phone number is on your Aadhaar card and it changes, you should update it so you don’t miss important messages.
Update Phone Number In Aadhar Card Online
These are just a few reasons why you might need to update your Aadhaar card.
Benefits of Accurate Information
Aadhaar is used for a variety of important services in India, both in the government and non-government sectors. Keeping your Aadhaar data accurate and updated is essential because it connects to many key aspects of everyday life. Here’s why maintaining correct Aadhaar information matters:
Aadhaar plays a critical role in accessing various government and non-government services, such as:
- Government Services: Programs and initiatives like subsidy benefits, pensions, scholarships, and social benefits often require Aadhaar for identification.
- Banking and Financial Services: Banks use Aadhaar for opening accounts, verifying identity, and providing other financial services.
- Insurance and Taxation Services: Many insurance policies and tax-related transactions rely on Aadhaar as a form of identity proof.
- Education and Employment: Schools, universities, and employers often require Aadhaar for verification and enrollment purposes.
- Healthcare Services: Aadhaar is used to access healthcare benefits, insurance, and other health-related programs.
Given its widespread use, ensuring that the Aadhaar data stored in the Central Identities Data Repository (CIDR) is correct and current is crucial. Inaccurate or outdated Aadhaar data can lead to issues when accessing these services, causing delays, rejections, or additional verification processes. Keeping your Aadhaar information updated helps you smoothly access the services and benefits you need.
Consequences of Incorrect Information
What happens if your Aadhaar card has the wrong information? It can cause some problems.
- Delays and confusion: If the information doesn’t match, you might face delays or even rejections when you’re trying to use government or banking services.
- Missing Out: If your address is wrong, you might miss out on important mail, like invitations or government notices.
- Extra Effort: If your Aadhaar card has incorrect information, you might need to spend extra time and effort fixing things or explaining why it’s wrong.
Keeping your Aadhaar card updated helps you avoid these issues.
Types of Aadhaar Updates
There are a few different kinds of updates that you might need to make to your Aadhaar card. Let us discuss them so you may understand exactly what can be modified and how.
Demographics Data Updates
This type of update involves changing basic information about you, like:
- Name: If your name has changed, you can update it on your Aadhaar card. This might happen if you get married or if there’s been a correction to your name.
- Date of Birth (DOB): If your date of birth is incorrect on your Aadhaar card, you should update it. This is important for proving your age when needed, such as for school or legal documents.
- Gender: If there’s an error with your gender or if you’ve transitioned and need to change it, updating your Aadhaar card is essential to ensure it reflects your identity.
- Address: If you’ve moved to a new place, it’s important to update your address so your Aadhaar card has the correct information. This way, important documents and mail will reach you without any trouble.
- Phone Number: If you have a new phone number, updating it on your Aadhaar card is a good idea. This way, if the government or other services need to contact you, they can do it easily.
- Email Address: Sometimes people change their email addresses. If this happens, you should update it on your Aadhaar card, especially if you use it for important communications.
These are the most common demographic data updates.
Biometric Updates
Biometric updates involve changes to physical features that are unique to you, such as:
- Fingerprints: Sometimes, your fingerprints need to be updated. This might happen if your fingerprints have changed due to an accident or over time.
- Iris Scans: The iris is the colored part of your eye. Sometimes, these scans need updating, especially if they weren’t clear the first time.
- Photographs: If your appearance has changed a lot, like when you grew up or after a significant physical change, updating your photograph on your Aadhaar card can be helpful.
Biometric updates are important because these features are used to verify your identity.
Aadhaar History and Verification
It’s a good idea to check the history of your Aadhaar card and make sure the information is correct. Here’s how you can do that:
- Checking Aadhaar Update History: You can find out if your Aadhaar card has been updated in the past and what changes were made. This helps you understand if there are any mistakes or if something needs correction.
- Verifying Current Information: It’s always good to double-check your Aadhaar card to ensure that all the information is up-to-date and accurate. This way, you can avoid problems when using it for government or private services.
These are the main types of updates you might need for your Aadhaar card.
Biometric Update For Children
Updates for Children’s Aadhaar Biometric Data: Children’s biometric data needs to be updated in their Aadhaar record twice, once at age five and again at age fifteen. The child’s fingerprints, iris scans, and photos must be taken and updated during this procedure. This ensures consistency in identification because the child’s Aadhaar number remains the same following these upgrades.
As children grow and their biometric characteristics change, this biometric update makes sure that their Aadhaar card remains as an accurate form of identification. Best of all, there is no cost associated with these required biometric updates for kids.
Updating the ‘Care of’ (C/o) Field in Aadhaar Address:
The ‘Care of’ (C/o) field in Aadhaar is part of the address section. Previously, it was shown as W/o (wife of), D/o (daughter of), S/o (son of), or C/o (care of). Now, it’s standardized to always display as C/O, regardless of the relationship type. If you update your Aadhaar or download the latest version, it will list the relationship information as C/O.
To update the ‘Care of’ field, you can submit an address update request either at an Aadhaar Enrolment Center or online through the Self Service Update Portal, as shown below. You must provide a document in your name, but it does not have to include the name of the person you wish to update in the C/O field. Note that this field is not mandatory, so you can leave it blank if you prefer.
In summary, if you want to update the ‘Care of’ information on your Aadhaar, you can do so without including anyone else’s name in the C/o field, and it’s not compulsory to have a C/o entry in your Aadhaar address.
Limits on number of updates
According to UIDAI’s update policy, there are certain limits on the number of times you can update specific demographic information in your Aadhaar:
Name: You can update this twice.
Gender: You can update this once.
Date of Birth: You can update this once.
For other demographic information—such as address, email ID, and mobile number—there are no limits on the number of updates. Similarly, biometric updates—like photographs, fingerprints, and iris scans—can be done as often as needed.
These flexible policies ensure that while certain critical information has limited updates to maintain data integrity, other fields can be updated as required without restrictions.
Exception Process for Aadhaar Update
If you need to update any of the three critical fields—name, gender, or date of birth—in your Aadhaar beyond the permissible limits, here’s the procedure to follow:
- Visit an Aadhaar Enrolment Centre: Take valid supporting documents to update your name or date of birth. Detailed list of supporting documents is available at – List of Supporting Document
- Place an Update Request: Request the required update at the centre and obtain an Update Request Number (URN).
- Request an ‘Exception Update’: Contact the Aadhaar help centre by calling 1947 or emailing help@uidai.gov.in with your URN and request an exception update.
Your request will be reviewed by the UIDAI’s Regional Office responsible for your region, which will conduct the necessary due diligence. Once verified, the update request will be processed, and you’ll receive the outcome notification.
Here is the procedure to verify the update status: Tracking the Status of Aadhaar Updates
Steps to Take if Your Aadhaar is Deactivated
Aadhaar data undergoes periodic quality checks, and during this process, UIDAI might find discrepancies in your supporting documents or captured biometric data, leading to temporary deactivation of your Aadhaar. If this happens, you will be notified via email, SMS, or letter. While your Aadhaar is deactivated, you cannot use Aadhaar-based OTP or biometric authentication for services.
Here’s what you need to do if your Aadhaar is deactivated:
- Check for Notifications: Review any communication from UIDAI to understand the reason for deactivation and the steps to reactivate it. You can also call 1947 for more information.
- Update Biometric Data: If the deactivation is due to biometric issues, visit any Aadhaar Enrollment Center to update your biometric data.
- Resolve Document Discrepancies: If the deactivation is due to document-related issues, contact or visit the relevant Aadhaar Regional Office for further guidance and provide the necessary supporting documents.
Following these steps should help you resolve issues related to Aadhaar deactivation and ensure smooth updates beyond the usual limits.
Points to Remember for Aadhaar Update and Cancellation
- Cancellation of Aadhaar Upon Reaching 18 Years: If you are an Aadhaar number holder and have recently turned 18, you can apply to cancel your Aadhaar number. The application for cancellation must be submitted to the Regional Office of UIDAI within six months from the date of turning 18.
- Application Process: To initiate the cancellation process, you must visit the designated Regional Office at the specified date and time. You will need to establish your identity through Aadhaar authentication or other acceptable means.
- Identity Verification: During your visit, you will undergo identity verification to ensure proper authentication before the cancellation process begins.
- Cancellation Timeline: Once the identity verification is complete, the Regional Office will initiate the process to cancel the Aadhaar number. This process is expected to be completed within three months.
If you wish to cancel your Aadhaar upon reaching adulthood, ensure you do so within the given time frame and follow the instructions provided by the UIDAI’s Regional Office. This process requires in-person authentication, so be prepared with the necessary documents and other identification proofs.
Steps to Update Aadhaar
Keeping your Aadhaar card updated is essential, and it helps to understand how to do it. Let’s break it down into simple steps, starting with figuring out if you need an update and then preparing for the update.
Identifying the Need for Updates
First, you need to know when it’s time to update your Aadhaar card. Here are some ways to figure out if your details need updating:
- Assess Your Information: Take a look at your Aadhaar card and check if everything is correct. Is your name spelled right? Does the address match where you live? If anything seems off, it might be time for an update.
- Common triggers for updates:
- Moving Houses: If you’ve moved to a new place, you should update your address on your Aadhaar card. This will ensure that your mail and other communications reach you.
- Getting Married: Sometimes, when people get married, their names change. If your name has changed, you need to update it on your Aadhaar card.
- New Phone Number: If you have a new phone number, it’s a good idea to update it on your Aadhaar card to ensure you receive important calls and messages.
- Legal Name Changes: If you’ve legally changed your name for any reason, you’ll need to update it on your Aadhaar card.
If any of these situations apply to you, it’s a good indication that you should update your Aadhaar card.
Preparing for Aadhaar Updates
Once you’ve decided to update your Aadhaar card, the next step is to gather the documents you’ll need. To update your Aadhaar card, you need to submit documents that prove your identity and address. Different types of updates require different documents. Here is a list of documents you can submit for identity, address, or both.
Documents for Both Identity and Address Proof:
These documents can be used to prove both your identity and your address:
- Ration Card: A government-issued card for food distribution.
- Voter Identity Card: The card you use to vote in elections.
- Kisan Photo Passbook: A booklet with photos, used by farmers.
- Indian Passport: A document for international travel.
- Government-issued Identity Card/Certificate: This could be a caste certificate, marriage certificate with a photo, or other identity cards issued by the government.
- Disability Identity Card/Certificate of Disability: Issued under the Rights of Persons with Disabilities Rules, 2017.
- Transgender Identity Card/Certificate: Issued under the Transgender Persons (Protection of Rights) Act, 2019.
- Certificate for Sex Workers: A certificate issued by the National AIDS Control Organization or a State AIDS Control Society.
- Certificate from Shelter Homes or Orphanages: Issued in UIDAI Standard Format.
- Prisoner Induction Document: Issued by a prison officer.
Documents for Identity Proof:
These documents are for proving who you are:
- School Leaving Certificate/Transfer Certificate with Photo: A certificate from school with your photo.
- Marksheet/Certificate with Photo: Issued by a recognized Board of Education or University.
- PAN/e-PAN Card: Used for tax purposes.
- Government/Statutory Body/PSU-Issued Photo Identity Card: This could be an employee or pensioner ID or a medical-claim card.
- Driving License: A card that allows you to drive.
- Freedom Fighter Photo Identity Card: Issued to Freedom Fighters.
Documents for Address Proof:
These documents are for proving where you live:
- Utility Bills: Electricity, water, gas, or telephone/mobile/broadband bills (not more than three months old).
- Bank/Post Office Passbook with Photo: A booklet with your account details and photo.
- Bank/Post Office Account/Credit-Card Statement: Dated within the last three months.
- Rent, Lease, or Leave & Licence Agreement: A legal document showing where you live.
- Certificate from Government Officials: This could be issued by an MP, MLA, MLC, municipal councillor, group ‘A’ or ‘B’ gazetted officer, or other government officials.
- Certificate from Village Authorities: Issued by village panchayat head/secretary or village revenue officer (for rural areas).
- Property Tax Receipt: Dated within the last year.
- Registered Sale Agreement or Gift Deed: Legal documents proving ownership or transfer of property.
- Accommodation Allotment Letter: Issued by a government, statutory body, or PSU (dated within the last year).
- Life or Medical Insurance Policy: Dated within the last year.
These documents are essential when updating your Aadhaar card to ensure you provide the correct information. Always check which documents are required for the specific type of update you’re planning to make.
How to Update Aadhaar Online
Updating your Aadhaar card online is a convenient way to correct or update your information without having to visit an enrolment centre. The Unique Identification Authority of India (UIDAI) provides a self-service portal where you can make changes from the comfort of your home. Here’s a step-by-step guide to walk you through the process of updating your Aadhaar details online.
Step 1: Visit the MyAadhaar Portal
- Open your web browser and go to the MyAadhaar portal at myadhaar.uidai.gov.in.

- Once there, find the “Document Update” section. This is where you can upload your proof of identity and proof of address documents to update your Aadhaar details.

Step 2: Log In Using OTP
- To access the self-service portal, you’ll need to log in with your Aadhaar number and a one-time password (OTP).
- Enter your Aadhaar number and the CAPTCHA code shown on the screen. Click on “Login with OTP.”

- An OTP will be sent to your registered mobile phone number. Enter this OTP into the designated field and click “Login.”

Step 3: Verify Your Information
- After logging in, you’ll see your Aadhaar details. Carefully check your name, date of birth, gender, and address to ensure they’re correct.
- Next, select the consent box to indicate that you agree to update your Aadhaar information online.

Step 4: Upload Required Documents
- Now, choose the documents you have available for proof of identity and proof of address. Make sure they’re in the right format—JPEG, PNG, or PDF—and that they are under 2MB in size.
- Start by uploading your Proof of Identity document.
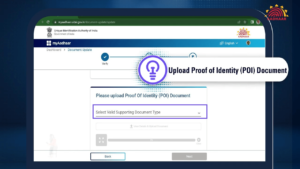
- Then proceed to upload your Proof of Address document. For guidance on which documents to use, see the ‘Preparing for Aadhaar Updates‘ section. Common identity proofs include passport, voter ID, or driver’s license, while common proofs of address include utility bills, rental agreements, or bank statements.

- After uploading your documents, give your consent to proceed with the update.
Step 5: Submit the Update Request
- Once everything is uploaded and verified, click “Submit” to complete your Aadhaar update request.
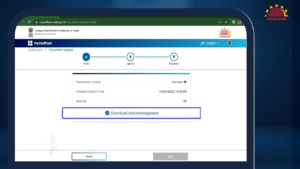
- You’ll receive a confirmation message indicating that your Aadhaar update has been successfully completed. You can also download an acknowledgment receipt for future reference.
Step 6: Save Your Acknowledgment Receipt
- After submitting your update request, be sure to download the acknowledgment receipt. This receipt contains a unique number that allows you to track the status of your update online.
- You can also scan the QR code displayed on the screen to download the receipt.
Note on Free Service
- The online document update service on the MyAadhaar portal is available free of charge until 14/June,2025. After that date, there might be a charge for updating documents online.
Following these steps, you can easily update your Aadhaar details online. If you encounter any issues, remember to check the “Common Issues and Solutions” section or reach out to Aadhaar customer support for assistance.
Tips for Successful Online Updates
- Clear Document Scans: Make sure the documents you upload are clear and easy to read. Blurry or unclear scans might cause delays or rejection.
- Document Accuracy: Ensure the information you enter matches the details on the uploaded documents. Any discrepancies can lead to rejection or delays.
- Correct Document Selection: Choose the appropriate document type that aligns with the one you uploaded. This ensures consistency and avoids confusion during verification.
- Name Match: The resident’s name on the update request must match the one on the uploaded document. Any mismatch can lead to issues during verification.
- Age Verification: The age specified in your document should align with the information on your Aadhaar card and the photo. Inconsistencies could result in delays.
- Gender Consistency: The gender listed on the document and the photograph on your Aadhaar card should be the same. Ensure there are no discrepancies.
- Correct File Formats: Use JPEG, PNG, or PDF for your document scans. If the format is wrong, the system might not accept it.
- File Size: Keep your document files under 2 MB. Larger files won’t upload properly.
- Registered Mobile Number: Ensure your mobile number is registered and working, as you’ll need it to receive OTPs for logging in and verifying updates.
- Follow Instructions Carefully: Stick to the steps and follow instructions. Any mistakes could delay the update or cause it to fail.
Following these tips will help you update your Aadhaar information online with ease and avoid common issues. Good luck with your update!
Updating Aadhaar at an Enrolment/ Update Centre
If you’re not sure how to update your Aadhaar card online, or you prefer doing things in person, you can visit an Aadhaar enrolment or update centre. These centres are places where you can update your Aadhaar details with the help of trained staff. Let’s discuss how to find one and what happens when you go there.
Finding a Centre
The first step is to locate a centre where you can update your Aadhaar card. Here’s how to do it:
- Use the UIDAI Website: The Unique Identification Authority of India (UIDAI) has a website that lets you find the nearest Aadhaar centre. You can search by your state, city, or even your postal code. Just type in your location, and it will show you the closest centres. Refer to our guide on:
- Ask Locally: Sometimes, people in your area might know where the nearest Aadhaar centre is. You can ask at your school, local government office, or nearby post office to find out where you can update your Aadhaar card.
Once you find a centre, it’s a good idea to call ahead to check their working hours and whether you need an appointment.
In-Person Update Process
When you visit an Aadhaar enrolment or update centre, here’s what you can expect:
- Fill Out a Form: When you arrive at the centre, you’ll need to fill out a form to indicate what information you want to update. This could be your name, address, phone number, or other details. To obtain the Aadhaar update form, use this link: Download Aadhaar Form. You can download and print the form, or you can request it from the enrolment centre when you visit to update your Aadhaar.
- Provide Required Documents: Depending on what you’re updating, you’ll need to bring specific documents. For example:
- For an address update, bring proof of your new address, like a utility bill or a rental agreement.
- For a name change, bring a legal document that shows your new name, like a marriage certificate or a gazette notification.
- For a phone number update, you might need to verify your new number with an OTP (One-Time Password). For guidance on which documents to use, see the ‘Preparing for Aadhaar Updates‘ section.
- Biometric Collection: If you’re updating biometric information, the centre staff will collect your fingerprints, iris scans, and a new photograph. This is important to ensure that your Aadhaar card reflects the most accurate information.
- Submit the Form and Documents: Once you’ve filled out the form and provided the necessary documents, submit them to the staff. They will check everything to make sure it’s correct.
- Receive an Acknowledgment Slip: After you’ve submitted your information, you’ll receive an acknowledgment slip. This slip has a unique number
{8-digit Update Request Number (URN)}that lets you track the status of your update online. Keep this slip safe, as it’s proof that you’ve submitted your update request.
Tracking the Status of Aadhaar Updates
Once you’ve updated your Aadhaar card, you’ll want to know if everything went smoothly. This section will explain how you can track the status of your Aadhaar update and what to do if there’s a delay or problem.
To check the status of your Aadhaar, you’ll need specific information depending on how you submitted your request:
- EID (Enrolment ID): This is your enrolment number, found at the top of your enrolment/update acknowledgment slip. It consists of two parts: a 14-digit enrolment number (like 1234/12345/12345) and a 14-digit date and time (yyyy/mm/dd hh:mm:ss) of enrolment. Together, these 28 digits form your enrollment ID (EID). This information is essential for checking your Aadhaar status online or at a centre.
- SRN or URN: SRN (Service Request Number) is used to track services like Aadhaar updates, while URN (Update Request Number) is generated when you update Aadhaar online. You can find these numbers on your acknowledgement slip or update confirmation.
If you’ve lost your EID, you can retrieve it using your registered mobile number.
Aadhaar Retrieve Lost Or Forgotten Eid
- Call the Aadhaar Helpline: Dial 1947 and provide your URN to get an update on your Aadhaar request status.
- Send an Email: Write to help@uidai.gov.in with your URN and other relevant details to inquire about your Aadhaar update status.
Aadhaar Update Status Online
Here’s how to check your Aadhaar status online using the Unique Identification Authority of India’s (UIDAI) website:
1. Visit the UIDAI Website
Open your web browser and navigate to the MyAadhaar website—the official online resource for Aadhaar-related services. This is where you can check the current status of your Aadhaar card.
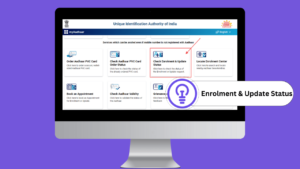
2. Navigate to “Check Aadhaar Status”
Once on the website, find the section labeled “Check Enrolment & Update Status.” This is where you’ll be able to track the progress of your Aadhaar enrolment or update request.
3. Enter Your EID, SRN, or URN
Next, input the required information in the appropriate fields. If you’re using an EID (Enrolment ID), make sure to enter all 28 digits—this includes the 14-digit enrolment number and the 14-digit date and time of enrolment. You can also use SRN or URN depending on your situation.
4. Complete the CAPTCHA
To confirm that you’re not a robot, complete the CAPTCHA challenge displayed on the screen.
5. View Your Status
After completing the CAPTCHA, click the “Submit” button. This will show you the current status of your Aadhaar request, indicating whether it’s still processing, completed, or if there are any issues requiring your attention.

These options allow you to monitor the progress of your Aadhaar update and ensure a smooth process from start to finish. If you encounter any issues, use these same channels for assistance.


